Sunday, September 29, 2013
Ringing an old wooden wall telephone
Today I took some time to give attention to an old wooden wall telephone that my father has been tinkering with. The goal is not so much to restore it to original shape, as it is to have a functional conversation piece on the wall of the garage shop. Actually, the real goal is to have fun playing with this stuff, but the cool old phone on the wall that actually works is fun too.
From what I can tell, the ringing signal is about 20Hz with an amplitude of roughly 50VRMS, after looking at the output of out OOMA box with the oscilloscope. So, I connected the old HP 201 signal generator to the bell (with it's 0.3uF capacitor in series) and started adding different springs, weight on the clapper arm, and changing the clapper position on the arm until I got the resonance into the 20Hz range. It seems that it will ring with +- 1 Hz excitation of so, so the Q of this pendulum resonator is about (20Hz/2Hz)=10. It was satisfying to actually hook it to the ooma box and call myself and actually have it ring, after a few attempts that did not ring.
Saturday, November 27, 2010
Bonhop Loom
When my wife's grandmother passed away not too long ago, they found an old toy loom at her place while tending to her estate. It had belonged to my wife's aunt. It was made by a company called Paul Bonhop Inc. in New York. It was mostly in good shape, but had a couple of busted comb-shaped plastic pieces on it. One is a heddle piece, and one is a beater comb. You can find the manual here. It looks like Bonhop made a couple of different models of this sort of loom, as you can see in this other blog entry .
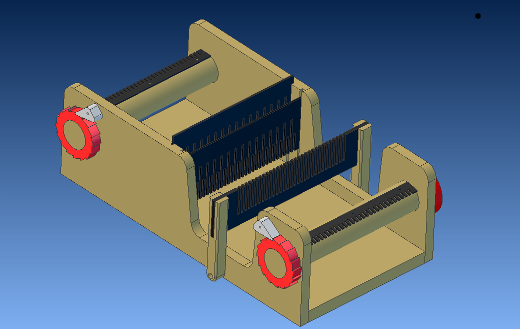
To make replacement pieces, I drew the broken pieces up in a solid modeling program. Since these pieces were amongst the most complicated pieces of the whole assembly, I modeled the rest of the assembly on a whim. For those of you who know about solid modeling, look for the Alibre Design format files here and the step format model here. A 3d PDF for the loom is found here. (Note: use these files at your own risk, there may be small mistakes in them.) All the pieces except the nails and screws are there in the model, if someone wanted to make their own from scratch.
I took some ABS sheet to Club Workshop to cut on their Epilog Laser cutting/etching machine to replace the broken parts. For the most part this worked reasonably well. 1/16" thick black ABS cut the best, and was used for the heddle piece. It did warp slightly under the heat, but the detail was well preserved. For the beater, I used white 1/8" thick ABS. This was harder to cut well, and required multiple passes with the 60 watt laser. It warped noticeably, and left behind black soot marks on the plastic that are very hard to remove. Nevertheless, I got useable parts out. I tried cutting the Beater from some scrap 1/8" acrylic lying around, but the comb tines on it were so thin that the brittle acrylic simply cracked and had teeth fall off. The ABS piece will simply bend under reasonable force, and then return to shape when no longer pushed. ABS is much tougher, even though it is a bit of a pain to use with the Epilog. I also confirmed for myself one thing my fellow makers at club workshop had warned me about: ABS really smells bad after being cut with the laser, and takes a long time to lose the odor.
Thanks to Derek, who showed me how to set my line weights in an Alibre Design drawing layer to less than 0.03 so that the laser print driver will interpret these outlines as a cut instead of a raster etch.
Anyway, the loom is working again now. Some lucky kid (or perhaps even an adult) can now make some textile with it.
Monday, September 06, 2010
HeeksCNC is starting to mature into a great CAM tool
I have been using HeeksCNC for a few months now to do CNC toolpath
generation with open source code. Check out this screenshot: 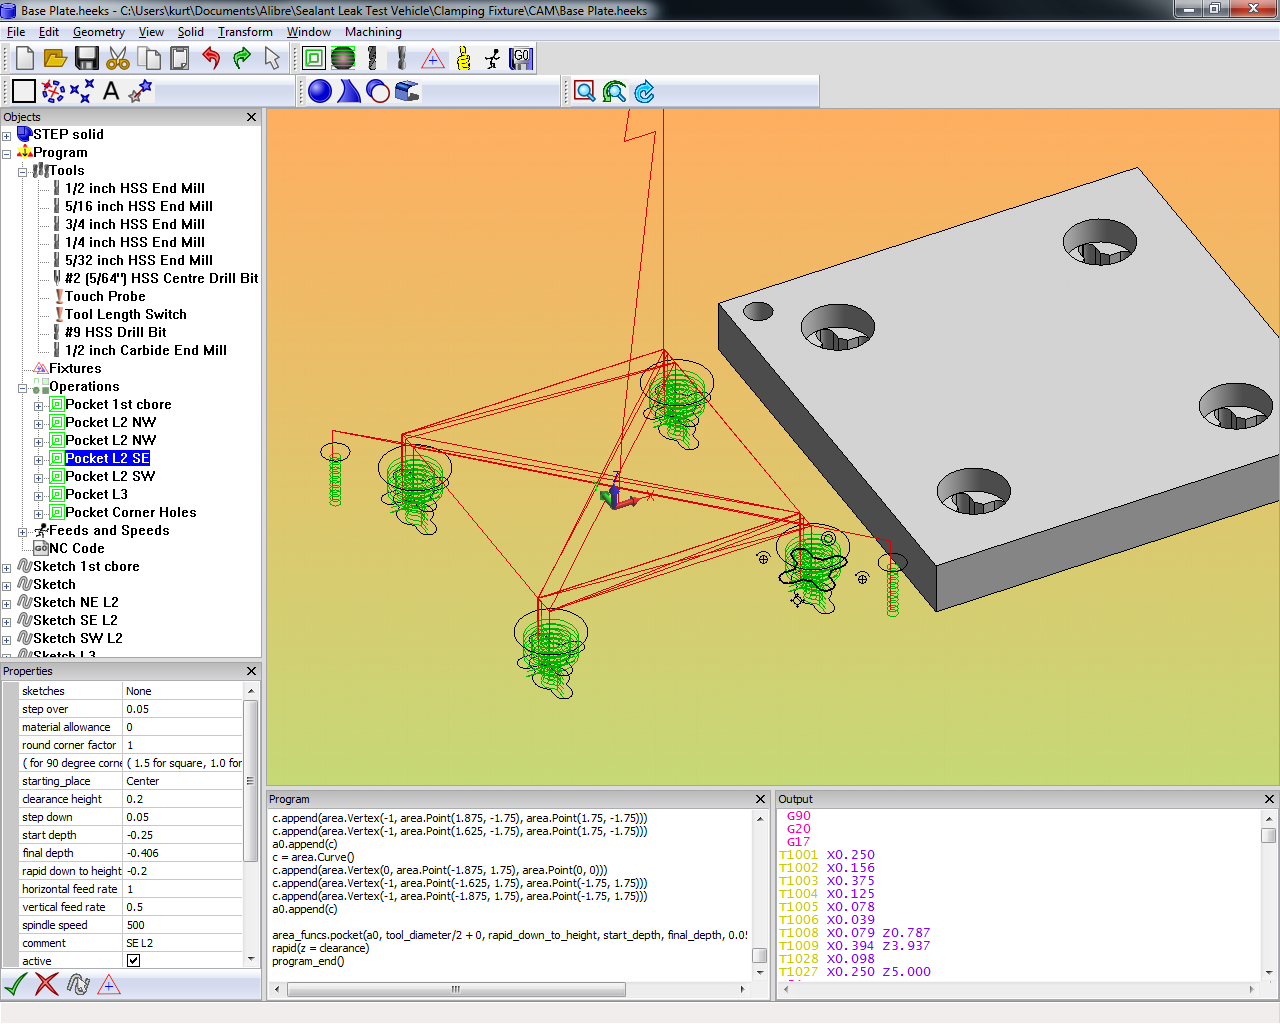
(My apologies to those of you with small monitors......)
I don't think it is bug free enough yet to be ready for a beginner to CNC, but at this point in time, it is becoming a powerful CAM tool if you are willing to save your work often. Also, the developers seem pretty dedicated with their ongoing work, so expect this program to get more robust as time goes on, just as it has for the past few months. For now, save your work often, because undo is not always reliable. The toolpath generators are taken from various open source projects. They are not really efficient as you might want for production shop work where the time - money tradeoff is critical. However, for hobby work and for some R&D applications this can be a very good fit. Linux and Windows versions are available. I don't know about OSX support, but I suspect it could be compiled together for that platform.
Check it out: HeeksCNC at Google Code
For me, my workflow to generate has been going something like this: Create a solid model part using Alibre Design . For each mill setup, create an Alibre assembly with only that part in it, and orient the part, so that the normal to the face I want to cut with the mill is along the positive z axis. Also, align the part such that you know where its edges are relative to the origin. I then export it as an STP or IGIS file, and then import it into HeeksCNC.
HeeksCNC supports EMC2 based machines very well, which is useful to me here at home with my HF mini-nill CNC conversion. However, if I need to make a part bigger than that table will handle, I go use the larger machines at Club Workshop . I just finished coding a rough cut of a HeeksCNC postprocessor appropriate for use with the Anilam Crusader M CNC controller on the Eagle Mill at Club Workshop . The screenshot above shows a toolpath generated for the Anilam Crusader M.
I hope more people use and contribute to the HeeksCNC project.
Sunday, July 18, 2010
Club Workshop Robotics Expo & Mini Maker Faire Denver 2010 - Recap
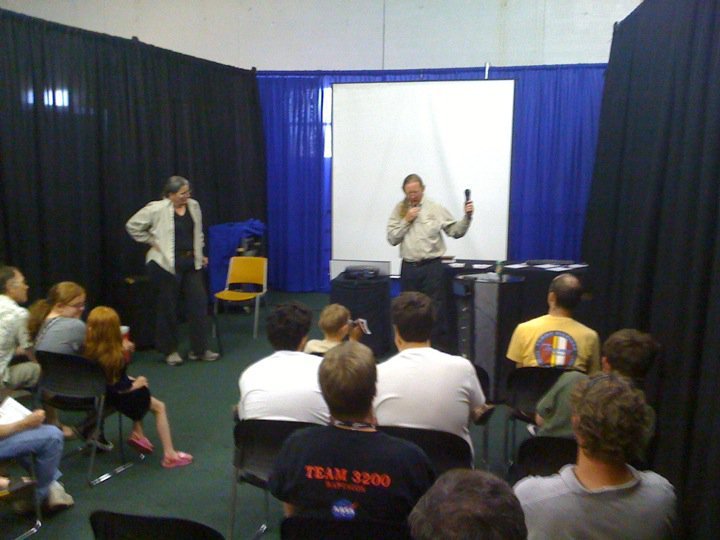
It was fun attending the Club Workshop Robotics Expo & Mini Maker Faire 2010 this past Saturday (July 17). Many fun things to see were there, both robotic and otherwise. I would guess that there was a turnout of approximately 200 people for the day. Kudos and thanks to Steve Garran of Club Workshop and to Steven Gentner of Roborealm for being a driving blast of organizational energy. George Mitsuoka represented Robot Magazine. As well, most of the rest of the gang from SHARC were there. Members of Front Range Robotics also came to show off a few bots. And, of course, many members of the Denver Maker's Group graced us with their presence.
We saw strong local vendor attendance in the robotic area, including Casey Kuhns and the gang from Road Narrows , Landon Cox from ESawdust, Kerwin Lumpkins from Robotic Football League, the guys from Cellbots, and Jim & Louise Gunderson and their jolly clan from Gamma Two Robotics.
Educational robotic groups were also in attendence, with FRC Team 443 Freelance Robotics fundraising by grilling us all yummy burgers and bratwursts. The newly formed BEST Robotics Mile High Hub had a couple of robots to show. Also we had Ross Parrent from Colorado FIRST Lego League bring an FLL arena with last year's challenge for the group to see.
The Denver Mad Scientists had John's Critter Crunch bot running, and Bill's cool PVC air gun powered by an exercise bike powering an air compressor.
Rich Ottosen Had some homebrew RPN calculators on display, and Gary Hayward had a cool LED-based wall mounted fireworks emulation project. Lynne Bruning was there educating the group about eTextiles. John Maushammer had some of his projects on display as well, including his very cool Asteroids Watch.
SHARC had originally planned to have a Trinity College style firefighting robot contest that day. However, we only got one partially working bot on the field. Thanks to Mike Shimnok for bringing his 'bot along to participate! Don from Front Range Robotics provided the playing field, as the one being put together by SHARC is still a work in progress as of this writing.
The Club workshop RepRap build group has been meeting weekly since April this year to try to get one of these machines up and running. I have been participating in this group. We did not have the machine completely debugged yet to the point where it was making parts, but we had it out anyhow to show and talk about.
I had SHARCeye there on display, and an iROBOT create platform with a netbook and Roborealm running Steve G.'s fiducial regonition demo. We had constant traffic for the whole event, with many friendly questions and lots of kids and parents coming by as well, interested in the projects and trying to interest their kids in such things.
On toward the evening, many of us retired to the nearby Breckenridge Brewery for well deserved malty fermentables. It was a fitting end to a very good day.
I apologize if I left anybody out! Pictured: Gamma Two Presenting. Picture credit to George Mitsuoka.
Tuesday, March 30, 2010
Sharceye's first run
Monday, March 22, 2010
AVC coming soon.... Sharceye Part I
Ooh! The time is flying by, and our 'bot fot the SparkFun 2010 AVC is coming along. Still, it is certainly not ready for prime time yet. Our robot is based on a scooter-type wheelchair, which has been stripped down to its base of rear drive wheels and front steering wheels:
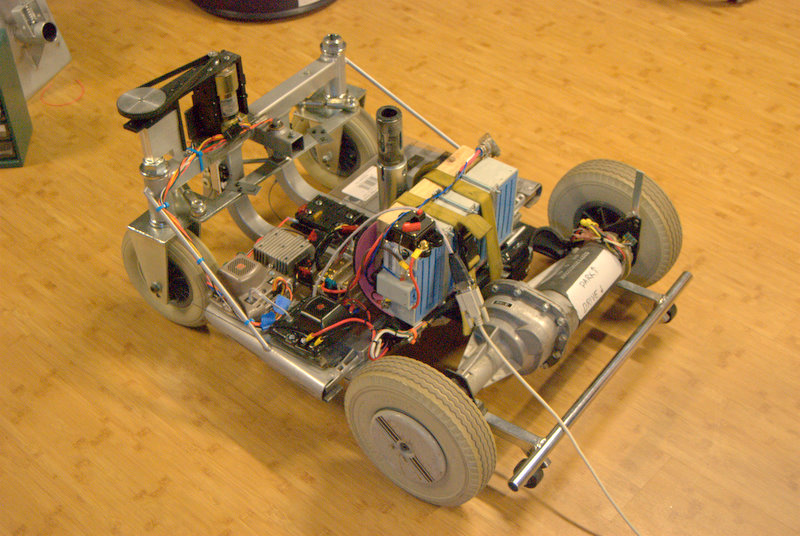
The rear wheels are controlled using a Black Jaguar motor controller, and the steering motor is controlled using a gear motor and quadrature rotary encoder, also driven by a Jaguar motor controller used in position servo mode. The front steering system includes a couple of opto-interrupter type limit switches which actuate at the extreme positions of the steering linkage.
The rear wheel system is powered from a 24V NiMH battery. The front steering system and most of the rest of the system is powered using a 24V to 12VDC buck converter capable of 10 Amp output. This can be seen in the picture as the heatsink looking thing abover and to the right of the beige Jaguar controller. It was originally designed for use in electric scooters that use a 24V motor drive, so that the vehicle running lights and instrumentation can all be used from industry standard 12V components.
As pictured here, the robot does not yet have the computer installed, which is a VIA based EPIA-N Nano-ITX board.